Understanding ISO, aperture, and shutter speed is essential for taking great photos. ISO controls your camera’s sensitivity to light—lower ISO for bright scenes, higher ISO for low light. Aperture affects how much light enters your lens and creates depth of field, with wide apertures blurring backgrounds. Shutter speed determines how motion is captured—fast speeds freeze action, slow speeds create blur. Mastering these settings helps you take better pictures in any situation; exploring their relationships will boost your skills further.
Key Takeaways
- ISO controls camera sensitivity to light; higher ISO brightens images but increases digital noise.
- Aperture adjusts the size of the lens opening, affecting brightness and depth of field (background blur).
- Shutter speed determines how long the shutter stays open; faster speeds freeze motion, slower speeds create motion blur.
- Balancing ISO, aperture, and shutter speed—known as the exposure triangle—ensures well-exposed, sharp images.
- Practice adjusting these settings in different lighting conditions to understand their effects on photo quality.
Top picks for "photography aperture shutter"
Open Amazon search results for this keyword.
As an affiliate, we earn on qualifying purchases.
Understanding ISO and Its Impact on Your Photos
Have you ever noticed how some photos turn out grainy or too dark, even in good lighting? That’s often due to your ISO setting. When you increase ISO, your camera becomes more sensitive to light, which is helpful in low-light situations. However, higher ISO also introduces digital noise—those tiny specks that make your image look rough or grainy. If you push ISO too high, your photo might resemble film grain from old film cameras, creating a textured look. Conversely, keeping ISO low minimizes digital noise, resulting in cleaner, sharper images. Finding the right balance is key. Adjust your ISO based on the lighting conditions, and you’ll avoid unwanted grain or noise, ensuring your photos look clear and professional. Additionally, understanding the relationship between ISO and contrast ratio can help you achieve better overall image quality. Recognizing how sensor sensitivity influences noise levels can further optimize your photography results. Knowing how camera settings interact can also help you tailor your exposure for different scenes, and paying attention to image noise reduction techniques can enhance your photos even further.
How Aperture Shapes the Look of Your Images
Aperture is one of the most powerful tools you have to control the look of your images. It determines how much light enters your camera and influences depth of field. A wide aperture (small f-number) creates a shallow depth of field, making your subject stand out against a blurred background. This effect is often enhanced by beautiful bokeh effects, where out-of-focus light points turn into soft, pleasing shapes. The number of aperture blades also affects the quality of these bokeh effects; more blades produce smoother, rounder bokeh, while fewer blades can create more angular shapes. By adjusting your aperture, you can shape the mood and focus of your photos, emphasizing your subject while blurring distracting backgrounds. Proper aperture control is a fundamental aspect of attention to detail in photography, helping you craft images with precise control and artistic intent. Additionally, understanding how lens characteristics impact aperture performance can further refine your photographic technique. For example, lens design can influence how well an aperture blades produce smooth bokeh across different focal lengths. Recognizing the relationship between aperture and light can help you better adapt to various lighting conditions and achieve consistent results.
Shutter Speed and Its Role in Capturing Motion

Shutter speed is a crucial setting that determines how long your camera’s sensor is exposed to light, directly affecting how motion appears in your photos. Faster shutter speeds freeze motion, making quick actions crisp and clear. Slower shutter speeds capture motion blur, creating a sense of movement and energy. To optimize motion capture, try these shutter speed techniques:
- Use fast shutter speeds (1/500s or faster) for sports or moving subjects
- Slow down to 1/30s or slower for intentional motion blur
- Use a tripod with slow shutter speeds to prevent camera shake
- Adjust shutter speed based on the speed of your subject
- Experiment with different speeds to find the perfect balance between sharpness and blur
- Remember that understanding the Environmental Considerations can help you practice sustainable photography and protect natural landscapes while capturing images.
- Additionally, being aware of the Battery Lifecycle can help photographers maintain their equipment and ensure consistent performance during shoots.
Mastering shutter speed techniques helps you control how motion is conveyed, making your photos dynamic and engaging.
Balancing ISO, Aperture, and Shutter Speed for Perfect Shots
To get the perfect shot, you need to balance ISO, aperture, and shutter speed based on your lighting conditions. This balance helps you control motion blur and achieve the right depth of field. Mastering these adjustments guarantees your photos are sharp, well-exposed, and visually compelling. Understanding Free Floating can also help you adapt your settings to achieve a more natural and balanced image. Additionally, familiarizing yourself with field‑of‑view and imaging‑scale concepts from deep-sky imaging guides can enhance your ability to predict how your camera settings will impact your final photograph. Recognizing the importance of exposure triangle is essential for making informed adjustments in various shooting scenarios.
Adjusting for Lighting Conditions
When lighting conditions change, adjusting your camera settings becomes essential to capturing a well-exposed shot. Bright daylight requires lower ISO to prevent unnecessary film grain, while indoor or low-light scenes may need a higher ISO. Keep an eye on color temperature to ensure accurate colors, especially with artificial lighting. Use aperture to control depth of field, and shutter speed to freeze motion or create motion blur. Remember, if the scene is dim, raising ISO or widening your aperture helps, but too much ISO can introduce unwanted grain. Conversely, in bright conditions, lowering ISO and narrowing the aperture reduces overexposure. Balancing these settings ensures your photo matches the lighting, maintaining natural tones and sharpness. Adjusting for lighting conditions is key to achieving perfect shots every time.
Controlling Motion Blur
Controlling motion blur requires a careful balance of your camera’s ISO, aperture, and shutter speed. To freeze fast-moving subjects and prevent motion streaks, use a fast shutter speed. Conversely, if you want to create intentional blur, such as smooth motion streaks, slow down the shutter speed. Adjust your ISO to maintain proper exposure without introducing noise—higher ISO allows for faster shutter speeds in low light. Aperture also plays a role: a wider aperture lets in more light, supporting faster shutter speeds, while a smaller aperture might require longer exposure times. By balancing these settings, you can either freeze motion for sharp images or introduce intentional blur to convey movement. Practice varies depending on your scene, but understanding this balance is key for controlling motion blur effectively. Regular practice and understanding of visual cues can further improve your ability to capture the desired motion effects.
Achieving Depth of Field
Have you ever wondered how photographers achieve a sharp foreground while softening the background? Achieving this depth of field depends on balancing your camera settings. For portrait lighting, a shallow depth of field isolates your subject, so use a wide aperture (like f/1.8). For landscape composition, a narrower aperture (f/11 or higher) increases everything’s sharpness. Adjust your ISO to maintain proper exposure without introducing noise. Shutter speed should match your scene; slower speeds work for stable shots, while faster speeds freeze motion. Keep these tips in mind:
- Use a wide aperture for blurred backgrounds in portraits
- Narrow your aperture for landscapes with maximum depth
- Balance ISO to prevent graininess
- Match shutter speed to motion in your scene
- Experiment with aperture for creative control
Choosing the Right Settings for Different Lighting Conditions
When lighting changes, you need to adjust your ISO to keep your photos clear and noise-free. Modifying your aperture settings also helps control how much light hits the sensor, especially in low-light or bright conditions. By mastering these adjustments, you’ll capture better shots regardless of the environment. Understanding camera settings is essential to adapt quickly to different lighting situations and improve your overall photography skills.
Adjust ISO Accordingly
Adjusting your ISO setting is essential for capturing clear images in different lighting conditions. When you increase ISO, your camera sensors become more sensitive to light, making it easier to shoot in low-light environments. However, higher ISO also introduces more image noise, which can reduce overall clarity. To find the right balance:
- Use low ISO (100-400) in bright, well-lit scenes for the clearest images
- Increase ISO (800-1600) in dimmer settings without a tripod
- Avoid excessively high ISO to prevent excessive image noise
- Keep ISO as low as possible to maintain image quality
- Adjust ISO based on your camera’s capabilities and lighting conditions
- Remember that light sensitivity varies among different camera models, affecting optimal ISO choices.
- Monitoring your camera’s dynamic range helps in selecting the best ISO for preserving details in shadows and highlights.
Modify Aperture Settings
Choosing the right aperture setting is essential for capturing well-exposed images in various lighting conditions. In bright light, use a smaller aperture (larger f-number) to prevent overexposure, while in low light, open the aperture wider for more light. Your lens coatings can influence image clarity and contrast, so choose lenses with good coatings to maximize performance across different aperture sizes. Adjusting the aperture blades affects the shape and softness of out-of-focus areas, or bokeh, which is especially noticeable in portrait shots. For sharp images in bright conditions, a narrower aperture with more blades creates cleaner backgrounds. Conversely, wider apertures with fewer blades produce a softer background blur. Mastering aperture modifications helps you adapt to lighting environments for ideal results. Additionally, understanding how lens coatings impact image quality can help you select the best equipment for different lighting situations. Being aware of aperture shape and number of blades allows for better control over the aesthetic qualities of your photos, especially in creative photography. Moreover, experimenting with different aperture settings and depth of field can significantly enhance your photographic expression. Exploring aperture adjustment techniques enables you to achieve more artistic and professional-looking images across various scenarios. Furthermore, paying attention to sensor size and resolution can also influence how aperture settings affect image sharpness and depth of field, helping you optimize your camera setup for different creative goals.
Common Shooting Scenarios and How to Adjust Your Settings

Different shooting scenarios demand different camera settings to capture the best image. For portrait lighting, you’ll want a wide aperture to soften the background and focus on your subject. In wildlife photography, use a fast shutter speed to freeze movement and prevent blur. When shooting in bright daylight, lower your ISO to reduce noise, but increase it in low-light conditions. Consider these adjustments:
- Use a wider aperture for portraits with soft backgrounds
- Increase shutter speed for quick-moving wildlife
- Raise ISO in dim environments to maintain exposure
- Adjust aperture for landscape shots to maximize depth of field
- Modify shutter speed to minimize motion blur in action scenes
- Select the appropriate camera settings based on the scenario to achieve optimal results, keeping in mind the importance of proper exposure for clear images.
Tips for Shooting in Low Light and Night Scenes
Shooting in low light or at night can be challenging, but with the right techniques, you can capture sharp, well-exposed images. For night photography, increase your ISO to make your camera sensor more sensitive to light, but avoid going too high to reduce noise. Use a tripod to stabilize your camera and prevent blur from longer shutter speeds. Look for street lighting or other available light sources to illuminate your subject naturally. Adjust your shutter speed to allow more light in, but keep it fast enough to avoid motion blur unless capturing intentional motion effects. If your camera has a wide aperture, open it up to gather more light. These tips help you take clear, vibrant night scenes even in challenging lighting conditions.
Using Aperture to Create Depth of Field Effects
By adjusting your aperture, you can blur the background to make your subject stand out and control how much light enters the lens. A wider aperture creates a softer, more blurred backdrop, while a narrower one keeps more in focus. Experimenting with focus distance also helps you achieve the perfect depth of field for your shot.
Blurring the Background
Have you ever wondered how photographers make their subjects stand out sharply against a soft, blurred background? It’s all about adjusting your aperture to create a shallow depth of field. Using a wide aperture (small f-number) isolates your subject, blurring the background beautifully. This technique enhances focus and adds a professional touch to your photos. Keep in mind, a narrow aperture increases depth of field, making everything sharp. When shooting, watch for lens flare, which can add artistic flair but may require positioning or lens filters to manage. After capturing, color grading can further emphasize your subject by adjusting tones and contrast. To master background blurring, consider:
- Using a telephoto lens
- Positioning your subject closer to the camera
- Shooting against distant backgrounds
- Choosing a wide aperture setting
- Avoiding bright light sources directly in frame
Controlling Light Intake
Controlling the amount of light that enters your camera is key to creating compelling depth of field effects. Using a wider aperture (lower f-number) lets in more light, creating a shallow depth of field that isolates your subject while blurring the background. This technique also helps reduce unwanted lens flare, which can occur when bright light hits the lens at certain angles. Adjusting the aperture influences the color temperature of your shot, as more light can warm or cool the image depending on the scene. Narrowing the aperture (higher f-number) decreases light intake, resulting in a greater depth of field with more of the scene in focus. Mastering aperture control allows you to creatively manage light and depth, shaping your images with intentional focus and mood.
Adjusting Focus Distance
Adjusting focus distance is vital for creating striking depth of field effects, especially when combined with aperture settings. To achieve this, you can use focusing techniques like manually adjusting focus or selecting autofocus modes suited to your scene. For close-up shots, focus on the subject to blur the background, enhancing depth. For landscapes, focus farther away to keep more of the scene sharp. Experiment with different focusing distances to see how they influence the depth of field. Remember, your camera’s autofocus modes—such as single, continuous, or manual focus—play a pivotal role in maintaining sharpness.
- Use manual focus for precise control
- Switch autofocus modes based on motion
- Focus on foreground elements for layered effects
- Adjust focus distance to enhance subject separation
- Combine with aperture for creative depth of field
Freezing Action and Creating Motion Blur With Shutter Speed
To freeze fast-moving subjects or create a pleasing sense of motion, your choice of shutter speed is essential. Use fast shutter speeds, like 1/1000 second, to freeze action sharply. For a dynamic effect, try panning techniques: move your camera along with the subject while using a slower shutter speed, like 1/30 second, to create motion blur in the background. This emphasizes movement and keeps the subject crisp. To avoid unwanted shake, apply motion stabilization if your camera or lens offers it—this helps keep your image clear during slower shutter speeds. Experiment with different speeds to find the perfect balance between freezing motion and capturing motion blur, giving your photos energy and storytelling depth.
Practice Exercises to Master ISO, Aperture, and Shutter Speed
Have you ever wondered how photographers develop a keen eye for exposure? Practice exercises are key. Start by shooting the same scene with different ISO settings to see how film grain appears and learn how it affects mood. Experiment with aperture adjustments to control depth of field, noting how it influences background blur. Vary shutter speeds to capture motion or freeze action, observing their impact on image sharpness. Use these exercises to understand color grading, seeing how exposure settings affect color tones. To make it engaging, try:
Master exposure by experimenting with ISO, aperture, and shutter speeds to enhance your photography skills.
- Shooting in low light to compare noise levels
- Creating a series with different aperture sizes
- Freezing fast-moving objects at high shutter speeds
- Intentionally underexposing and overexposing shots
- Applying post-processing to explore color grading effects
These exercises sharpen your skills and deepen your understanding of exposure fundamentals.
Frequently Asked Questions
How Do I Choose the Best ISO for Different Environments?
You should choose the best ISO settings based on environmental lighting conditions. For bright outdoor scenes, keep ISO low (like 100-200) to avoid graininess. In low-light environments, raise ISO (around 800-1600 or higher) to capture enough light without sacrificing image quality. Always adjust your ISO to match the lighting, so your photos stay clear and well-exposed without introducing noise or unnecessary grain.
What Are the Effects of Using Extreme Aperture Values?
Using extreme aperture values is like squeezing a sponge—your depth of field either becomes razor-thin or nearly everything is in focus. Wide apertures (small f-numbers) create a shallow depth of field, producing beautiful bokeh effects that blur backgrounds. Conversely, narrow apertures (large f-numbers) give you a deep focus, keeping more of the scene sharp. But beware, extreme apertures can introduce issues like diffraction or soft images, affecting overall quality.
How Do Shutter Speed and ISO Work Together in Low Light?
In low light, shutter speed and ISO work together to control sensor sensitivity and light exposure. You should increase ISO to make your sensor more sensitive to light, allowing for faster shutter speeds that freeze motion and prevent blur. However, be mindful that higher ISO can introduce noise. Adjust both settings carefully to balance enough light with image quality, ensuring your photo is well-exposed without unnecessary grain.
Can I Manually Adjust All Camera Settings for Optimal Shots?
Yes, you can manually adjust all camera settings for ideal shots. Switch to manual mode to control ISO, aperture, and shutter speed yourself. Use manual focus when you want precise control over focus points, especially in challenging lighting. Experiment with different camera modes like aperture priority or shutter priority to find what works best for your scene. This way, you tailor your camera settings to achieve the perfect shot every time.
What Common Mistakes Should I Avoid With These Settings?
You should avoid camera shake by using a faster shutter speed or a tripod, especially in low light. Be careful not to overexpose your shot by setting your ISO too high or opening the aperture too wide. Keep an eye on your exposure indicators, and remember that adjusting one setting affects others. Practice, review, and adjust your settings to prevent common mistakes and capture sharp, well-exposed images.
Conclusion
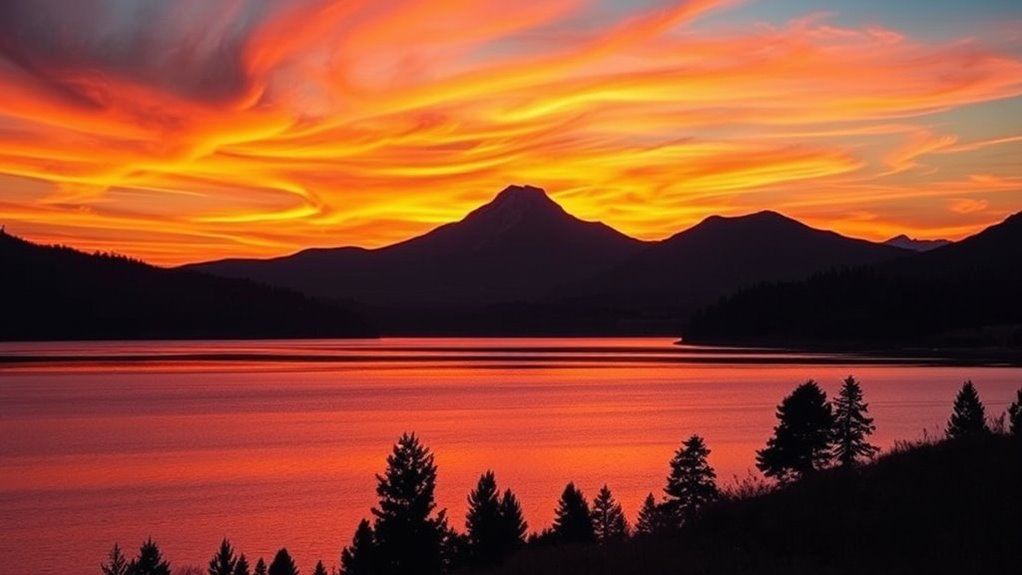
Now that you understand ISO, aperture, and shutter speed, you’re ready to take control of your camera. For example, if you’re shooting a sunset, lower your ISO, open your aperture, and slow down your shutter speed to capture vibrant colors and smooth motion. Practice adjusting these settings in different scenarios, like sports or night scenes. With experience, you’ll intuitively create stunning photos that perfectly match your vision. Keep experimenting and enjoy the journey!