

When selecting the best virtualization servers for Proxmox in 2026, I focus on powerful hardware that supports virtualization extensions like Intel VT-x or AMD-V, plenty of RAM, and fast storage options like NVMe or SSDs. I look for servers with multiple network interfaces, PCIe expansion, and energy efficiency, too. These features guarantee smooth performance, scalability, and reliability. If you’re curious about the top models and what to take into account, keep going for detailed insights.
Key Takeaways
- Servers supporting Intel VT-x or AMD-V with robust IOMMU for efficient PCI passthrough and virtualization performance.
- Hardware with at least 16 GB RAM, SSD/NVMe storage, and scalable expansion options for future upgrades.
- Multi-network interface cards supporting bonding, VLANs, and high-speed connectivity (10GbE+) for optimal networking.
- Energy-efficient CPUs with low TDP, high-quality power supplies, and hardware designed for low power consumption.
- Compatibility with Proxmox VE 8.x features like ZFS, Ceph, clustering, high availability, and advanced security capabilities.
| Proxmox VE Virtualization Bootable USB Drive |  | Best All-in-One | Management Interface: Web-based console | Storage Support: ZFS, LVM, Ceph, NFS | Deployment Method: USB bootable | VIEW LATEST PRICE | See Our Full Breakdown |
| Mastering Proxmox Third Edition: Virtualized Environment Building |  | Expert’s Resource | Management Interface: GUI + CLI guidance | Storage Support: Ceph, ZFS, LVM, NFS | Deployment Method: ISO install + setup | VIEW LATEST PRICE | See Our Full Breakdown |
| Proxmox VE for Game Servers and Virtualization |  | Game Server Ready | Management Interface: Web GUI + CLI | Storage Support: NVMe, ZFS, LVM, Ceph | Deployment Method: USB + network install | VIEW LATEST PRICE | See Our Full Breakdown |
| Proxmox VE 8 Guide for Beginners and Experts |  | Beginner Friendly | Management Interface: GUI + command reference | Storage Support: ZFS, Ceph, LVM, NFS | Deployment Method: USB + network deployment | VIEW LATEST PRICE | See Our Full Breakdown |
| Home Server with Proxmox Home Assistant Pi-hole TrueNAS | 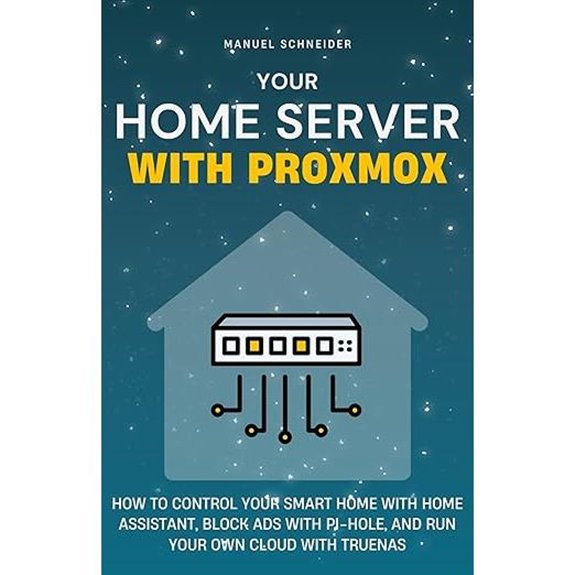 | Home Automation Hub | Management Interface: Web management + setup guides | Storage Support: ZFS, LVM, NAS, local storage | Deployment Method: DIY setup + step-by-step | VIEW LATEST PRICE | See Our Full Breakdown |
| Proxmox VE 8.x: Build Secure Virtualization Environments |  | Enterprise-Grade | Management Interface: Web GUI + scripting tips | Storage Support: ZFS, Ceph, LVM, snapshots | Deployment Method: ISO + network | VIEW LATEST PRICE | See Our Full Breakdown |
| Proxmox VE Virtualization Bootable USB Drive | | Portable Convenience | Management Interface: Web-based console | Storage Support: ZFS, LVM, Ceph, NFS | Deployment Method: USB boot + plug & play | VIEW LATEST PRICE | See Our Full Breakdown |
| Proxmox Cookbook |  | Power User’s Tool | Management Interface: GUI + CLI recipes | Storage Support: Ceph, ZFS, LVM, local disks | Deployment Method: ISO + CLI setup | VIEW LATEST PRICE | See Our Full Breakdown |
| Proxmox VE for Cloud Edge Computing and Virtualization |  | Cloud & Edge | Management Interface: Web GUI + API | Storage Support: Ceph, ZFS, LVM, SAN/NAS | Deployment Method: Network install + automation | VIEW LATEST PRICE | See Our Full Breakdown |
| Proxmox VE for Cybersecurity and Penetration Testing | 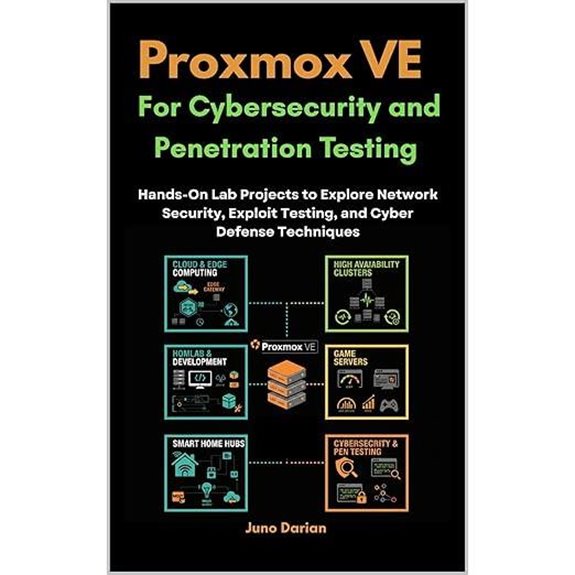 | Cybersecurity Focus | Management Interface: GUI + automation support | Storage Support: Ceph, ZFS, local storage | Deployment Method: USB + network deployment | VIEW LATEST PRICE | See Our Full Breakdown |
| Proxmox Homelab Guide for Virtualization and DIY Cloud | 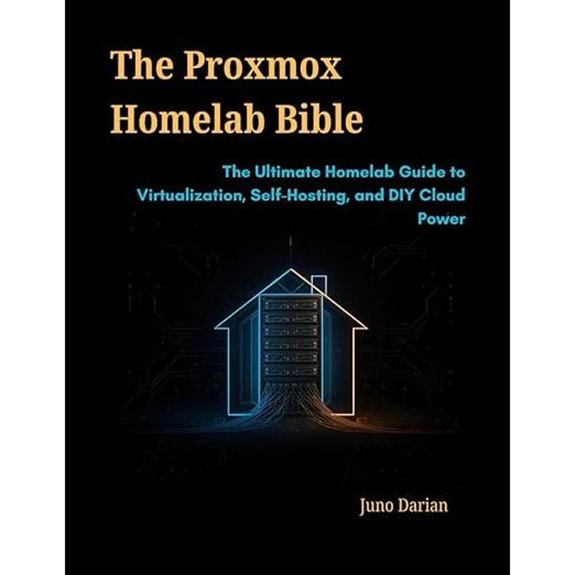 | DIY Homelab | Management Interface: Web GUI + tutorials | Storage Support: ZFS, Ceph, LVM, snapshots | Deployment Method: ISO + step-by-step | VIEW LATEST PRICE | See Our Full Breakdown |
| Proxmox VE Virtualization Guide (Japanese Edition) | 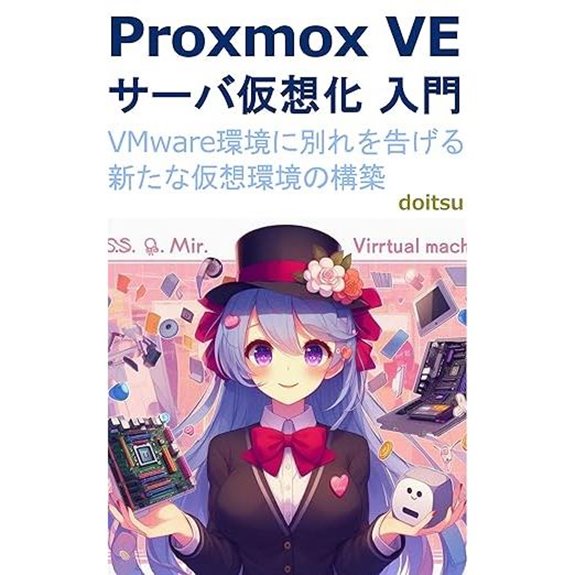 | Japanese Edition | Management Interface: Web GUI + troubleshooting | Storage Support: ZFS, Ceph, LVM, SAN/NAS | Deployment Method: USB + network | VIEW LATEST PRICE | See Our Full Breakdown |
| Proxmox VE 9 Mastery: Virtualization and Datacenter Guide | 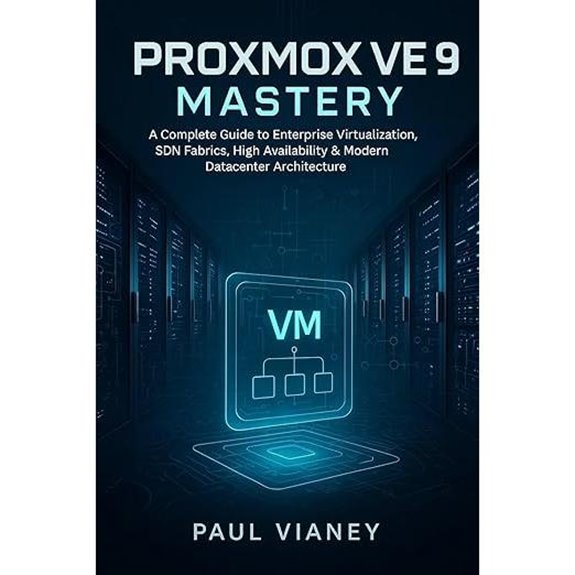 | Data Center Ready | Management Interface: Web interface + API | Storage Support: ZFS, Ceph, LVM, SAN/NAS | Deployment Method: ISO + network | VIEW LATEST PRICE | See Our Full Breakdown |

More Details on Our Top Picks
-

Mastering Proxmox - Third Edition: Build virtualized environments using the Proxmox VE hypervisor
As an affiliate, we earn on qualifying purchases.
Proxmox VE Virtualization Bootable USB Drive
If you’re looking for a hassle-free way to set up Proxmox VE, the Virtualization Bootable USB Drive is an excellent choice. It allows you to run Proxmox directly from a USB stick, making deployment quick and straightforward. You don’t need to worry about complex installations or configuring dedicated hardware; just plug it in, boot, and start managing your virtual environment. Built on a stable Debian base with an optimized kernel, it offers reliable performance. Its native support for storage options like ZFS, LVM, Ceph, and NFS ensures data protection and scalability. This makes it perfect for home labs, testing, or even small business use.
- Management Interface:Web-based console
- Storage Support:ZFS, LVM, Ceph, NFS
- Deployment Method:USB bootable
- Clustering & High Availability:Yes, all-in-one platform
- Use Cases:Home labs, testing, production
- Security & Backup:Data protection via storage options
- Additional Feature:Built on Debian Linux
- Additional Feature:Plug & Play deployment
- Additional Feature:Native ZFS support
-
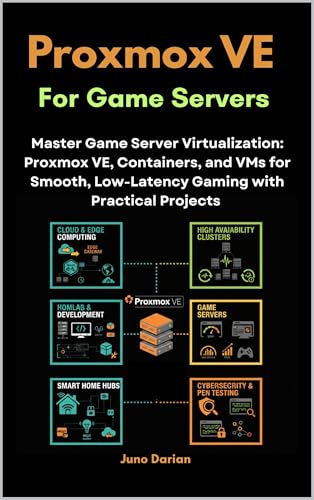
Proxmox VE for Game Servers: Master Game Server Virtualization: Proxmox VE, Containers, and VMs for Smooth, Low-Latency Gaming with Practical Projects ... and Optimize Real-World Environments)
As an affiliate, we earn on qualifying purchases.
Mastering Proxmox Third Edition: Virtualized Environment Building
Mastering Proxmox Third Edition provides essential insights for IT professionals and system administrators aiming to build robust virtualized environments. I find this book invaluable for understanding Proxmox VE’s core features, including advanced installation, GUI navigation, and internal architecture. It guides you through creating and managing KVM virtual machines and Linux Containers, with practical tips on configuring virtual networks and storage systems like Ceph. The book emphasizes high availability, security, and backup strategies, helping you safeguard your environment. Plus, it covers monitoring tools and disaster recovery techniques, ensuring you’re prepared for real-world challenges in deploying reliable, scalable virtual infrastructures.
- Management Interface:GUI + CLI guidance
- Storage Support:Ceph, ZFS, LVM, NFS
- Deployment Method:ISO install + setup
- Clustering & High Availability:Advanced clustering, HA
- Use Cases:Enterprise, testing, development
- Security & Backup:Backup, snapshots, security features
- Additional Feature:Advanced cluster management
- Additional Feature:Storage system integration
- Additional Feature:Disaster recovery techniques
-

Proxmox VE 8 Practical Guide: Information, Tips, and Tricks for Proxmox Beginners and Advanced Users
As an affiliate, we earn on qualifying purchases.
Proxmox VE for Game Servers and Virtualization
Proxmox VE stands out as an ideal choice for hobbyists and small-scale game server hosts seeking reliable, low-latency virtualization without hefty cloud costs. It’s perfect for hosting Minecraft worlds, CS:GO tournaments, or personal labs. I recommend using containers like LXC for performance-critical games, while VMs offer better compatibility and isolation for diverse titles. Hardware choices matter—NVMe SSDs, ample RAM, and proper network setup ensure minimal ping and jitter. With automation tools, backups, and monitoring, you can maintain high uptime and smooth gameplay. Proxmox makes it straightforward to go from beginner to professional, all on a budget.
- Management Interface:Web GUI + CLI
- Storage Support:NVMe, ZFS, LVM, Ceph
- Deployment Method:USB + network install
- Clustering & High Availability:Multi-node clusters
- Use Cases:Game servers, hobbyist
- Security & Backup:Data integrity, snapshots
- Additional Feature:Performance tuning tips
- Additional Feature:Hardware optimization guides
- Additional Feature:Automation with scripting
Proxmox VE 8 Guide for Beginners and Experts
This guide is an essential resource for both beginners and advanced users looking to harness the full potential of Proxmox VE 8. Written by Ralf-Peter Kleinert, it offers detailed instructions on installation, clustering, automation, and security. The book uses clear explanations, step-by-step screenshots, and links to helpful YouTube tutorials, making complex topics accessible. It emphasizes practical setup, firewall configuration, and troubleshooting, with updates based on user feedback to improve clarity and depth. Whether you’re just starting or managing advanced environments, this guide provides the exhaustive knowledge you need to deploy and optimize Proxmox VE 8 effectively.
- Management Interface:GUI + command reference
- Storage Support:ZFS, Ceph, LVM, NFS
- Deployment Method:USB + network deployment
- Clustering & High Availability:Clustering, HA features
- Use Cases:Beginners, professionals
- Security & Backup:Firewall, backup guides
- Additional Feature:Extensive screenshot tutorials
- Additional Feature:Firewall and Fail2Ban setup
- Additional Feature:YouTube tutorial links
Home Server with Proxmox Home Assistant Pi-hole TrueNAS
Setting up a home server with Proxmox is an excellent choice for tech enthusiasts who want full control over their smart home, network security, and storage solutions without relying on expensive commercial systems. I use Proxmox to run virtual machines and containers for Home Assistant, Pi-hole, and TrueNAS, creating a centralized, secure environment. This setup allows me to manage smart devices, block ads network-wide, and access reliable local storage. It’s beginner-friendly with step-by-step guidance, yet powerful enough to customize and expand. Building this system has boosted my IT skills and given me complete independence over my digital home. It’s a flexible, cost-effective way to streamline home automation, security, and data management.
- Management Interface:Web management + setup guides
- Storage Support:ZFS, LVM, NAS, local storage
- Deployment Method:DIY setup + step-by-step
- Clustering & High Availability:Multi-node, failover
- Use Cases:Smart home, storage, DIY
- Security & Backup:Data safety, snapshot support
- Additional Feature:Smart home integration
- Additional Feature:Network-wide ad blocking
- Additional Feature:Local storage setup
Proxmox VE 8.x: Build Secure Virtualization Environments
Building secure virtualization environments with Proxmox VE 8.x is essential for IT professionals and organizations aiming for robust, scalable infrastructures. I’ve found that combining features like ZFS for data integrity, role-based access control, and VLAN segmentation creates a resilient foundation. Proxmox’s tools for automated backups, high-availability clusters, and live migration further enhance security and uptime. By following practical deployment guides and configuration recipes, I guarantee my virtual environments are enterprise-ready. From setting up storage to implementing firewalls, Proxmox VE 8.x provides the flexibility and security needed for modern virtual infrastructures. It’s a thorough solution for building dependable, scalable systems.
- Management Interface:Web GUI + scripting tips
- Storage Support:ZFS, Ceph, LVM, snapshots
- Deployment Method:ISO + network
- Clustering & High Availability:Cluster setup, HA best practices
- Use Cases:Data centers, enterprise
- Security & Backup:Security tools, backup strategies
- Additional Feature:GPU passthrough features
- Additional Feature:Multi-node cluster setup
- Additional Feature:Cloud-Init automation
Proxmox VE Virtualization Bootable USB Drive
A Proxmox VE Virtualization Server bootable USB drive offers a straightforward, plug-and-play setup that’s perfect for IT professionals, developers, and hobbyists who need quick deployment without complicated installations. With this solution, you can easily install and run Proxmox VE directly from the USB, saving time and effort. It supports all-in-one virtualization, including KVM and LXC, managed through a user-friendly web interface accessible from any browser. Native storage support for ZFS, LVM, Ceph, and NFS ensures scalability and data protection. Built on Debian Linux with an optimized kernel, it guarantees stability, performance, and reliable operation across various environments.
- Management Interface:Web-based console
- Storage Support:ZFS, LVM, Ceph, NFS
- Deployment Method:USB boot + plug & play
- Clustering & High Availability:Supports clustering
- Use Cases:Small business, testing
- Security & Backup:Secure boot, storage snapshots
- Additional Feature:Optimized Debian kernel
- Additional Feature:Multi-platform deployment
- Additional Feature:Scalable storage options
Proxmox Cookbook
The Proxmox Cookbook is an essential resource for system administrators who want practical, step-by-step guidance on managing Proxmox VE environments. It offers over 60 recipes covering installation, configuration, and management of virtualized server solutions. I find it especially useful for learning to set up clusters, configure storage like Ceph and ZFS, and implement data protection strategies. The book also details security measures, resource monitoring, and performance tuning. With clear instructions, illustrations, and code snippets, it’s perfect for those looking to deepen their skills in complex virtual environments. Whether you’re managing small setups or enterprise deployments, this cookbook is a valuable, hands-on reference.
- Management Interface:GUI + CLI recipes
- Storage Support:Ceph, ZFS, LVM, local disks
- Deployment Method:ISO + CLI setup
- Clustering & High Availability:Cluster management, HA
- Use Cases:Server management, enterprise
- Security & Backup:Firewall, RAID, backup
- Additional Feature:Storage solution recipes
- Additional Feature:CLI command references
- Additional Feature:Enterprise upgrade strategies
Proxmox VE for Cloud Edge Computing and Virtualization
Proxmox VE stands out as an ideal choice for organizations aiming to modernize their infrastructure with flexible virtualization solutions, especially when deploying private clouds or edge computing networks. I find its open-source nature and support for KVM and LXC containers perfect for scalable, distributed workloads. Whether you’re building a resilient private cloud, deploying IoT and edge AI solutions, or enabling remote access, Proxmox offers practical deployment options. Its architecture supports clustering, high-availability setups, and advanced storage like Ceph and ZFS, making it a thorough platform. Automation, security, and real-world project guidance ensure you can implement efficient, secure environments tailored to modern cloud and edge needs.
- Management Interface:Web GUI + API
- Storage Support:Ceph, ZFS, LVM, SAN/NAS
- Deployment Method:Network install + automation
- Clustering & High Availability:Multi-node clusters
- Use Cases:Cloud, edge, IoT
- Security & Backup:Security practices, disaster recovery
- Additional Feature:Edge computing deployment
- Additional Feature:Multi-NIC network strategies
- Additional Feature:IoT and AI projects
Proxmox VE for Cybersecurity and Penetration Testing
For cybersecurity professionals and penetration testers seeking a flexible, secure environment to develop and refine their skills, Proxmox VE stands out as an ideal platform. It allows me to create realistic, isolated labs for tasks like penetration testing, malware analysis, and SOC simulations, all within a single homelab. I can design segmented networks, automate deployments, and scale environments using tools like Ansible and Terraform. The platform’s support for advanced storage options like ZFS and LVM-thin guarantees data integrity and quick snapshots. Proxmox’s flexibility makes it easy to practice offensive and defensive techniques safely, making it invaluable for honing cybersecurity expertise.
- Management Interface:GUI + automation support
- Storage Support:Ceph, ZFS, local storage
- Deployment Method:USB + network deployment
- Clustering & High Availability:HA, clustering
- Use Cases:Cybersecurity, pentesting
- Security & Backup:Segmentation, snapshots, backups
- Additional Feature:Segmented attack zones
- Additional Feature:Reproducible lab environments
- Additional Feature:Security testing workflows
Proxmox Homelab Guide for Virtualization and DIY Cloud
Whether you’re just starting out or aiming to build a sophisticated home cloud, this guide offers essential insights into deploying Proxmox for virtualization and DIY cloud projects. I’ll show you how to efficiently deploy VMs and containers, understanding KVM and LXC differences for maximum performance. You’ll learn to build cost-effective homelabs, from $500 starter setups to multi-node clusters with high availability. The guide covers expanding into clustering, live migration, Ceph storage, and Kubernetes. Plus, I’ll walk you through hosting services like Nextcloud, automating workflows, and securing your environment with advanced networking and storage solutions, empowering you to create a robust, private cloud.
- Management Interface:Web GUI + tutorials
- Storage Support:ZFS, Ceph, LVM, snapshots
- Deployment Method:ISO + step-by-step
- Clustering & High Availability:Multi-node, failover
- Use Cases:Homelabs, personal cloud
- Security & Backup:Data safety, snapshots
- Additional Feature:Cost-effective hardware builds
- Additional Feature:Kubernetes orchestration
- Additional Feature:Data protection strategies
Proxmox VE Virtualization Guide (Japanese Edition)
If you’re seeking a cost-effective and flexible virtualization platform tailored for Japanese users, the Proxmox VE Virtualization Guide (Japanese Edition) is an invaluable resource. It introduces Proxmox VE as an open-source, Debian-based platform that’s easy to install and manage. The guide details system requirements, installation steps, and provides clear instructions for creating and managing virtual machines. It also shares performance optimization tips and troubleshooting strategies to keep your environment stable. Whether you’re a beginner or experienced user, this guide helps you leverage Proxmox VE’s core features efficiently, making it an essential tool for deploying reliable virtualization solutions in Japan.
- Management Interface:Web GUI + troubleshooting
- Storage Support:ZFS, Ceph, LVM, SAN/NAS
- Deployment Method:USB + network
- Clustering & High Availability:Clusters, HA strategies
- Use Cases:Data center, enterprise
- Security & Backup:Security protocols, backups
- Additional Feature:Troubleshooting techniques
- Additional Feature:Performance optimization tips
- Additional Feature:User-friendly VM management
Proxmox VE 9 Mastery: Virtualization and Datacenter Guide
Proxmox VE 9 stands out as an essential platform for virtualization professionals aiming to build resilient, enterprise-grade datacenters. Based on Debian 13 Trixie, it delivers powerful open-source virtualization features like clustering, high availability, and hyper-converged infrastructure. This guide goes beyond basic setup, helping you master complex functionalities such as storage management with ZFS, Ceph integration, and failover strategies. It emphasizes automation with tools like Ansible and Terraform, hardware passthrough for high-performance workloads, and security hardening techniques. Mastering these elements enables you to design scalable, fault-tolerant datacenter environments that are both flexible and future-proof.
- Management Interface:Web interface + API
- Storage Support:ZFS, Ceph, LVM, SAN/NAS
- Deployment Method:ISO + network
- Clustering & High Availability:High availability, clustering
- Use Cases:Virtualized datacenter, edge
- Security & Backup:Hardened environment, backup
- Additional Feature:Hyper-converged infrastructure
- Additional Feature:Hardware IOMMU passthrough
- Additional Feature:Enterprise clustering features
Factors to Consider When Choosing a Virtualization Server for Proxmox

When selecting a virtualization server for Proxmox, I focus on hardware compatibility, storage options, and network connectivity to make certain of smooth operation. Scalability and power efficiency also matter, especially if I plan to grow or optimize energy use over time. Considering these factors helps me choose a setup that’s reliable, future-proof, and efficient.
Hardware Compatibility Requirements
Choosing the right virtualization server for Proxmox hinges on guaranteeing hardware compatibility, as the system relies heavily on specific features for ideal performance. First, confirm the CPU supports virtualization extensions like Intel VT-x or AMD-V, essential for hardware-assisted virtualization. The motherboard’s chipset must also be compatible and support IOMMU for PCI passthrough, enabling direct device access for VMs. Adequate RAM—typically 16 GB or more—is vital for running multiple virtual machines smoothly. Additionally, verify that your storage controllers and drives support ZFS, LVM, or Ceph, which provide scalable, reliable storage options. Lastly, confirm network interfaces support VLAN tagging and bonding, offering flexible network configuration and segmentation. Meeting these hardware requirements guarantees a stable, efficient Proxmox environment.
Storage Performance Options
Selecting the right storage performance options is essential because they directly impact the responsiveness and scalability of your virtualized environment. I recommend using local SSDs or NVMe drives for high-speed access, especially for I/O-intensive workloads. Network-based storage like Ceph, NFS, or iSCSI can also deliver scalability, but require high bandwidth and low latency links—preferably 10GbE or higher—to avoid bottlenecks. Employing ZFS as a backend boosts performance with caching features like ARC and L2ARC, but it demands ample RAM. Thin provisioning methods like LVM-Thin offer flexible storage allocation with minimal overhead, though they need proper tuning to prevent performance drops. For critical environments, RAID configurations such as RAID 10 with SSDs strike a balance between redundancy and speed, ensuring ideal performance.
Network Connectivity Strategies
Reliable network connectivity forms the backbone of an effective Proxmox virtualization environment, ensuring smooth communication between virtual machines, containers, and storage systems. To achieve this, I recommend using multiple network interfaces combined with bonding or teaming, which provides redundancy and boosts bandwidth for high-availability setups. Implementing VLANs and network segmentation helps isolate traffic types—such as management, storage, and workloads—enhancing security and performance. Investing in advanced network hardware that supports features like VirtIO, SR-IOV, or RDMA can dramatically reduce latency and increase throughput for demanding applications. Additionally, planning for scalable architectures, including support for VLANs, VXLANs, or SDN solutions, prepares your infrastructure for future growth. These strategies ensure your Proxmox environment remains resilient, secure, and capable of handling increasing network demands.
Scalability and Expansion
When evaluating a virtualization server for Proxmox, it’s crucial to take into account its capacity for future growth. You should confirm the hardware supports expanding RAM, CPU, and storage to handle increasing workloads. Look for servers with multiple PCIe slots and network interfaces, making it easier to add peripherals and network cards later. Verify that the motherboard and chassis can accommodate higher-capacity drives and multiple drive bays for scalable storage solutions. Additionally, consider how straightforward it is to upgrade or replace components without significant downtime. A modular design with hot-swappable drives and accessible hardware components is ideal. These features help future-proof your setup, ensuring you can expand seamlessly as your virtualization needs evolve.
Power Efficiency Consider
As you plan for future growth and expansion, considering power efficiency becomes increasingly vital to keep operational costs manageable. Choosing energy-efficient CPUs with low TDP ratings can considerably cut power consumption during demanding workloads. Opting for power supplies with high efficiency ratings, like 80 Plus Gold or higher, reduces energy waste and heat output, saving energy and cooling costs. Implementing hardware with low idle power draw and advanced power management features further optimizes overall energy use. Additionally, proper server sizing and workload planning help avoid over-provisioning, which can lead to unnecessary power consumption and higher energy bills. Prioritizing power efficiency not only reduces operational costs but also minimizes environmental impact, making it an essential factor in selecting a virtualization server for Proxmox.
Frequently Asked Questions
How Does Hardware Compatibility Influence Virtualization Server Performance?
Hardware compatibility directly impacts virtualization server performance because incompatible or outdated components can cause bottlenecks, crashes, or slowdowns. I’ve learned that selecting hardware optimized for virtualization—like modern CPUs, ample RAM, and compatible storage—ensures smooth operation. When hardware aligns well with virtualization needs, I experience better stability, faster VM responses, and more efficient resource utilization. It’s essential to check compatibility before deploying to avoid performance issues down the line.
What Are the Energy Efficiency Considerations for Proxmox Servers?
They say “a penny saved is a penny earned,” and that’s true for Proxmox servers too. I focus on energy-efficient components like low-power CPUs, SSDs, and power supplies to cut down on energy use. Proper cooling and virtualization settings also help reduce power consumption. By choosing energy-conscious hardware and optimizing configurations, I guarantee my Proxmox environment runs smoothly without wasting power or money.
How Do Networking Options Impact Virtual Machine Connectivity?
Networking options directly impact my virtual machine connectivity by determining data transfer speed, stability, and security. I choose bridges, bonds, or VLANs based on my needs, guaranteeing VMs communicate efficiently with minimal latency. Proper configuration allows seamless integration with physical networks, while advanced options like SDN or VLAN tagging enhance security and traffic management. Ultimately, selecting the right networking setup ensures my virtual environment runs smoothly and reliably.
What Security Features Are Essential for Virtualization Environments?
I believe strong security features are crucial in virtualization environments. I prioritize features like robust firewall protection, secure boot, and regular patching to defend against vulnerabilities. Encrypted storage and network segmentation help keep data safe, while multi-factor authentication adds an extra layer of security. By implementing these, I guarantee my virtual environment remains protected from threats and unauthorized access, maintaining integrity and trust in my virtualized systems.
How Scalable Are Different Virtualization Server Options for Growth?
Scaling swiftly is straightforward with the right virtualization server. I find that enterprise-grade options like Dell PowerEdge or Supermicro servers excel, offering expandable memory, storage, and CPU capacity. They’re designed for growth, giving me the flexibility to add resources as my needs evolve. Smaller or budget-friendly servers, while suitable initially, might hit a growth wall faster. So, I recommend investing in scalable, sturdy servers for seamless, scalable success.
Conclusion
Choosing the right virtualization server for Proxmox is like finding the perfect foundation—it sets the stage for everything to run smoothly. As you explore options, remember that the best choice quietly supports your growth, offering stability and adaptability. Trust your instincts, and don’t rush the process. In time, you’ll discover the subtle details that make your virtualization journey truly exceptional, turning your setup into a resilient, seamless environment.