To edit photos on your phone, start by choosing an easy app like Snapseed or Lightroom that matches your goals. Use basic tools like cropping, straightening, and adjusting brightness, contrast, and saturation to enhance your images. Explore filters, add text or stickers, and experiment with effects for extra creativity. Save your edits and share effortlessly. Keep practicing these simple tricks, and you’ll discover even more ways to make your photos stand out.
Key Takeaways
- Choose user-friendly photo editing apps with essential tools like cropping, brightness, contrast, and filters for quick edits.
- Use filters and subtle adjustments to enhance mood, style, and overall aesthetic of your photos easily.
- Apply creative effects, text, stickers, and overlays to personalize and elevate your images.
- Correct alignment, straighten horizons, and crop images to improve composition and focus on key subjects.
- Save, organize, and back up your edited photos to maintain a tidy workflow and prevent data loss.
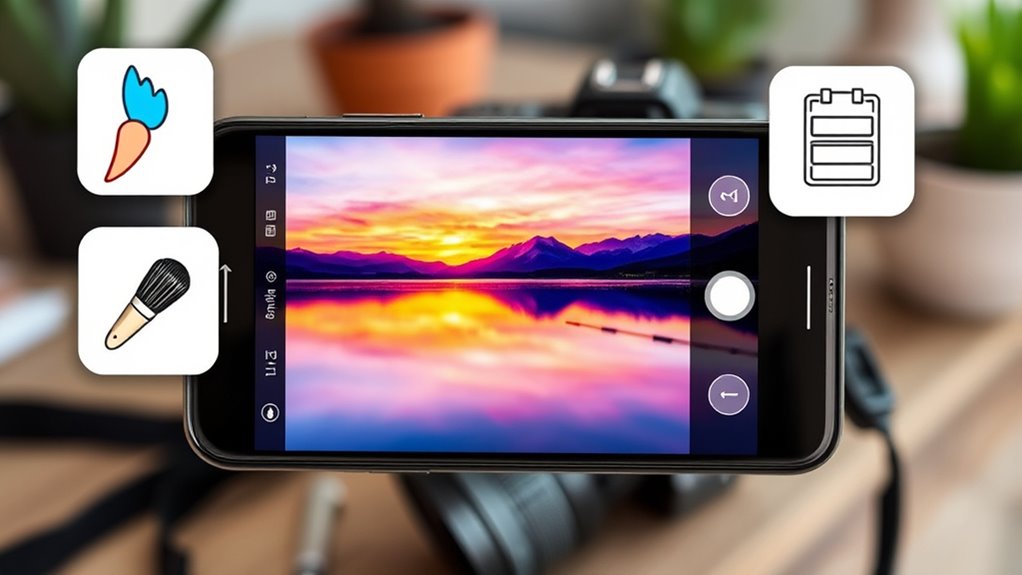
Top picks for "edit photo phone"
Open Amazon search results for this keyword.
As an affiliate, we earn on qualifying purchases.
Choosing the Right Photo Editing App for Your Needs
Choosing the right photo editing app depends on what you want to achieve and how you prefer to work. To stay current, consider photo editing trends that influence popular tools, such as AI-powered filters or advanced retouching features. When choosing professional tools, look for apps that offer a broad range of features like layers, masks, and precise adjustments. If you’re aiming for quick edits, apps with intuitive interfaces and preset filters work well. For more control, select apps that provide manual editing options. Remember, the best app aligns with your skill level and editing style. By understanding your goals and keeping up with trends, you’ll find a tool that elevates your photos and fits seamlessly into your workflow. Additionally, choosing apps that integrate with innovative European cloud servers can enhance your editing experience through secure and efficient cloud storage. Incorporating advanced color correction tools can further improve the quality of your edits, especially if you want to achieve true-to-life colors similar to those in high-quality home cinema projectors. Being aware of famous personalities’ images, like Kate or Christian Yelich can also inspire your editing style and help you understand current visual trends. Moreover, selecting apps that incorporate AI-driven editing features can streamline the process and help you achieve professional-looking results more quickly.
Basic Editing Tools to Enhance Your Photos

Cropping and straightening help you focus on the main subject and fix tilted horizons quickly. Adjusting brightness and contrast can make your photos look more vibrant and balanced. Mastering these basic tools lets you enhance your images effortlessly. Additionally, exploring Free Floating techniques can add a unique, natural touch to your photos, making them stand out even more.
Cropping and Straightening
Have you ever taken a photo that looks great but feels a little off because of distracting elements or uneven horizons? Cropping and straightening are your go-to tools to fix this. By cropping, you remove unwanted objects or empty space, focusing attention on your subject. Straightening helps correct tilted horizons, making your photo look more balanced. Many photo editing apps offer quick editing shortcuts, allowing you to crop and straighten with just a few taps. Keep in mind, cropping can also enhance the impact of photo filters by creating a more compelling composition. Straightening ensures your scene feels natural and professional. These simple adjustments can notably improve your shot’s overall appearance, making your images more polished and visually appealing without complicated steps. Embracing artistic expression through these edits can also help you develop a more creative approach to your photography. Additionally, understanding basic editing tools can empower you to make more precise adjustments and elevate your photos even further.
Adjusting Brightness and Contrast
After cropping and straightening your photo, adjusting the brightness and contrast can make your image truly stand out. Use the photo histogram to see the tonal range, ensuring your image isn’t too dark or too bright. Exposure adjustment helps fine-tune the overall lightness, revealing details in shadows and highlights. Increasing brightness lifts dull areas, while decreasing it adds depth. Contrast adjustment widens the tonal gap between light and dark areas, making your photo pop. Aim for a balanced histogram that avoids clipping on either end. Small tweaks can dramatically improve your shot, giving it a polished look. Remember, subtle adjustments often yield the best results. With these tools, you can enhance your photo’s clarity and visual impact effortlessly.
Applying Filters for Instant Style Boosts

Applying filters can instantly elevate the look of your photos by adding mood, tone, and style with just a tap. Filter application is a quick way to achieve a cohesive aesthetic or a specific vibe without complex edits. When you choose a filter, you’re enhancing the overall style of your shot, making colors pop or creating a muted, vintage feel. This style enhancement simplifies the editing process, saving you time while still delivering striking results. Many apps offer a variety of filters, so you can experiment to find the perfect match for your photo’s mood. Remember, subtlety is key—overusing filters can make your images look unnatural. Use filters thoughtfully to add that instant style boost and make your photos stand out. Additionally, understanding credit card terms can help you manage your finances better, ensuring you avoid unnecessary expenses while editing or sharing your photos online. Being aware of photo editing best practices can also guide you in achieving professional-looking results with ease. For example, knowing how to evaluate investment options like Bitcoin IRAs can teach you to choose the right tools and strategies for your goals. Exploring digital photography techniques can further enhance your editing skills and photo quality, especially when selecting camera settings that complement your editing style.
Adjusting Brightness, Contrast, and Saturation

Adjusting brightness, contrast, and saturation allows you to fine-tune your photos and create a more balanced, vibrant image. These edits are key steps in color grading, helping you achieve the desired mood and tone. Brightness controls the overall lightness, while contrast enhances the difference between dark and light areas, adding depth. Saturation boosts or reduces the intensity of colors, making your photo pop or appear more muted. Tone mapping makes subtle adjustments to how tones are distributed, improving detail and dynamic range. By carefully tweaking these settings, you can transform a flat shot into a visually striking image. Remember, small adjustments often yield the best results, so take your time to experiment and find the right balance for your photo. Additionally, understanding how adaptive lighting can automatically optimize exposure and tone can further enhance your editing process. Recognizing the impact of lighting conditions helps you decide when manual adjustments are necessary for optimal results.
Cropping and Straightening for Better Composition

Have you ever noticed how a simple crop or a slight straighten can dramatically improve a photo’s composition? Cropping helps with photo framing, removing distractions and focusing on your subject. Cropping also allows you to improve visual balance**, making your images more pleasing to the eye. Straightening ensures the horizon** alignment is level, preventing tilted images that feel off-balance. To enhance your shot, consider these steps:
- Use cropping to tighten the frame around your subject for better focus.
- Adjust the crop to eliminate unnecessary background clutter.
- Straighten the image to keep horizons level, making the photo feel more natural.
- Utilize smart editing tools that leverage AI to automatically improve your composition and straighten lines for a polished look.
- Remember, good photo composition starts with proper cropping and horizon alignment—simple tools with big impact. As with deep-sky imaging, paying attention to framing and alignment can significantly enhance your results. Additionally, understanding the fundamentals of visual balance can help you create more pleasing images.
These small adjustments can turn a decent shot into a stunning one by improving overall balance and visual appeal.
Using Advanced Features: Text, Stickers, and Effects

Adding text, stickers, and effects can instantly transform your photos into fun and personalized images. You can get creative by using different fonts and colors or by placing stickers that match your mood or theme. Experimenting with these features makes your editing more engaging and uniquely yours. Incorporating advanced editing features can help you achieve more polished and professional-looking shots.
Adding Text Creatively
Wondering how to make your photos stand out? Adding text creatively can do just that. To truly elevate your images, explore these options:
- Experiment with typography styles to match the mood of your photo.
- Play with creative placement by positioning text in unexpected areas.
- Use advanced effects to add shadows or glow for extra impact.
- Remember to consider ownership essentials when sharing your images online to ensure your content remains protected and appropriate.
- Incorporate visual hierarchy by varying font sizes and weights to guide viewers’ attention effectively.
Start by choosing bold or elegant typography styles that complement your photo’s theme. Don’t be afraid to move your text around—placing it off-center or along curves creates visual interest. Use effects sparingly to enhance readability and aesthetic appeal. With these techniques, your captions will not only convey your message but also become part of the artwork itself. Remember, creative placement and varied typography styles are key to making your text stand out seamlessly.
Incorporating Fun Stickers
After experimenting with creative text placement and styles, it’s time to take your photos up a notch with fun stickers. Using creative sticker placement lets you add personality and humor to your images. Choose fun sticker themes that match your photo’s vibe—whether it’s playful, cute, or quirky. Don’t just slap stickers randomly; think about how they complement the scene, highlight details, or create a visual story. Resize, rotate, and position stickers precisely to make your edits seamless. Many editing apps offer a variety of sticker packs, so explore different themes like emojis, icons, or seasonal designs. Incorporating fun stickers makes your photos more engaging and personalized, turning ordinary shots into fun, memorable keepsakes.
Applying Unique Effects
To make your photos truly stand out, you can apply unique effects that go beyond basic edits by using advanced features like custom text, stickers, and special effects. These tools allow you to add a creative flair with creative filters and abstract overlays that enhance your images. To do this effectively:
- Experiment with creative filters to give your photos a distinctive look or mood.
- Add abstract overlays to create textured or artistic backgrounds that make your shot pop.
- Insert custom text or stickers to communicate a message or add humor, blending them seamlessly with your effects.
Saving and Sharing Your Edited Photos

Once you’ve finished editing your photos, saving and sharing them become quick and straightforward processes. To keep your images organized, choose a consistent method for saving, like creating folders within your photo gallery. Use your device’s sharing options to upload directly to social media or send via messaging apps. Consider backup solutions, such as cloud storage or external drives, to prevent loss. Additionally, implementing a simple document management system can help you keep track of your digital photos and other files easily. Keeping your digital assets organized ensures efficient access and management of your photos over time. For added security, explore photo backup options that automatically sync your images to prevent accidental deletion. Understanding the odor characteristics of substances can also help you identify potential issues with your photos, such as detecting signs of spoilage or contamination. Properly organizing your files can also improve your workflow efficiency, making it easier to locate and edit images when needed. Here’s a quick guide:
| Save Options | Sharing Methods | Backup Solutions |
|---|---|---|
| Save to device gallery | Share via social media | Cloud storage services |
| Export to albums | Send through messaging apps | External drives |
| Save in high resolution | Copy link for sharing | Automated backups |
| Save in original size | Email photos | Offline backups |
This keeps your photos safe, accessible, and ready to share instantly.
Tips for Consistently Improving Your Photo Editing Skills

Improving your photo editing skills is an ongoing process that requires intentional practice and a willingness to learn. To get better consistently, focus on these key areas:
- Study photo composition by analyzing professional shots and practicing framing your subjects thoughtfully.
- Experiment with lighting techniques, such as adjusting brightness and contrast, to enhance mood and clarity.
- Review your edits regularly, noting what works and what doesn’t, and seek feedback from others to refine your skills.
Frequently Asked Questions
How Do I Choose the Best Editing App for Beginners?
To choose the best editing app for beginners, start by considering your photo editing workflows and what features you need. Look for apps with simple interfaces and easy-to-use tools. Compare app features to see which offer essential options like cropping, filters, and adjustments. Read reviews and try free versions to test user-friendliness. The right app will streamline your editing process and help you create stunning shots effortlessly.
Can I Edit RAW Photos on My Phone?
Yes, you can edit RAW photos on your phone. Many apps support RAW editing, allowing you to adjust exposure, contrast, and color with precision. Use mobile filters to enhance your shots further, but keep in mind that editing RAW files offers more flexibility and higher quality results. Look for apps like Adobe Lightroom or Snapseed, which are user-friendly and designed for efficient RAW editing on your device.
What Are Some Common Mistakes to Avoid When Editing?
When editing photos, avoid common mistakes like over editing, which can make images look unnatural. Be cautious with color correction—too much adjustment can distort the original tones. Always compare your edits to the original to make sure you enhance, not ruin, the photo’s quality. Take your time, and don’t rush the process. By steering clear of these pitfalls, you’ll create stunning shots that look professional and true to life.
How Do I Maintain Natural Skin Tones While Editing?
A picture is worth a thousand words, so keep your edits simple. To maintain natural skin tones while editing, avoid overdoing adjustments like saturation and contrast. Use tools like skin tone sliders or selective editing to preserve consistency across your shots. Keep your edits subtle and consistent, ensuring your subject’s skin looks authentic. Remember, less is more; aim for a natural look that enhances, not distorts.
Are There Free Apps With Professional Editing Features?
Yes, there are free apps with professional editing features. Apps like Snapseed and VSCO offer extensive photo filter options and advanced tools suitable for detailed edits. They are compatible with most smartphones and easy to navigate, making them ideal for enhancing your shots without spending a dime. You can adjust everything from brightness to skin tones, ensuring your photos look polished and natural.
Conclusion
Now that you know the basics and some pro tricks, editing your photos on your phone becomes easier and more fun. With the right app and a little practice, you can create stunning shots that truly stand out. So, why settle for ordinary when you have the power to turn everyday moments into eye-catching images? Start experimenting today, and watch your photography skills grow—your perfect shot is just a tap away!