To install a smart thermostat yourself, start by verifying that your system supports the device and that your Wi-Fi network is stable and compatible. Turn off your HVAC power, carefully remove the old thermostat, and label the wiring before disconnecting. Mount the new thermostat base on the wall, connect the wires as per the instructions, then restore power. Connect to Wi-Fi through the app, run the setup, and customize your settings. If you want more detailed steps, continue exploring how to make the process smooth and straightforward.
Key Takeaways
- Turn off HVAC power at the breaker, then remove the old thermostat and label wires carefully.
- Check your system’s compatibility with the smart thermostat and Wi-Fi standards before installation.
- Mount the new thermostat base securely, connect wires according to manufacturer instructions, and ensure proper voltage.
- Connect the thermostat to Wi-Fi via the app, follow pairing prompts, and run the setup routine.
- Customize settings, create schedules, and verify reliable operation to enjoy energy savings and home comfort.
Installing a smart thermostat can seem intimidating, but with the right preparation, it’s a straightforward process that can greatly improve your home’s comfort and energy efficiency. The first step is to verify your existing system is compatible. Most smart thermostats rely on wireless connectivity, so you’ll want to confirm that your Wi-Fi network is stable and compatible with the device. Check whether your thermostat supports your home’s wireless standards, such as Wi-Fi 802.11 b/g/n, and confirm that your network security settings won’t interfere with the device’s connectivity.
Next, you need to examine your current wiring and voltage requirements. Most modern thermostats operate on standard low-voltage wiring, typically 24 volts AC, which is common in most residential HVAC systems. Before you start, turn off power to your HVAC system at the breaker to prevent any electrical mishaps. Remove your existing thermostat’s cover and check the wiring. Make sure that the wires are properly labeled or note which wire connects to each terminal. This step is vital because mismatched wiring can damage your new thermostat or cause it to function improperly. Many smart thermostats come with compatible wiring adapters or suggest compatible wiring configurations, but double-checking your voltage requirements and wiring setup helps you avoid surprises.
Check your wiring and voltage to ensure compatibility before installing your smart thermostat.
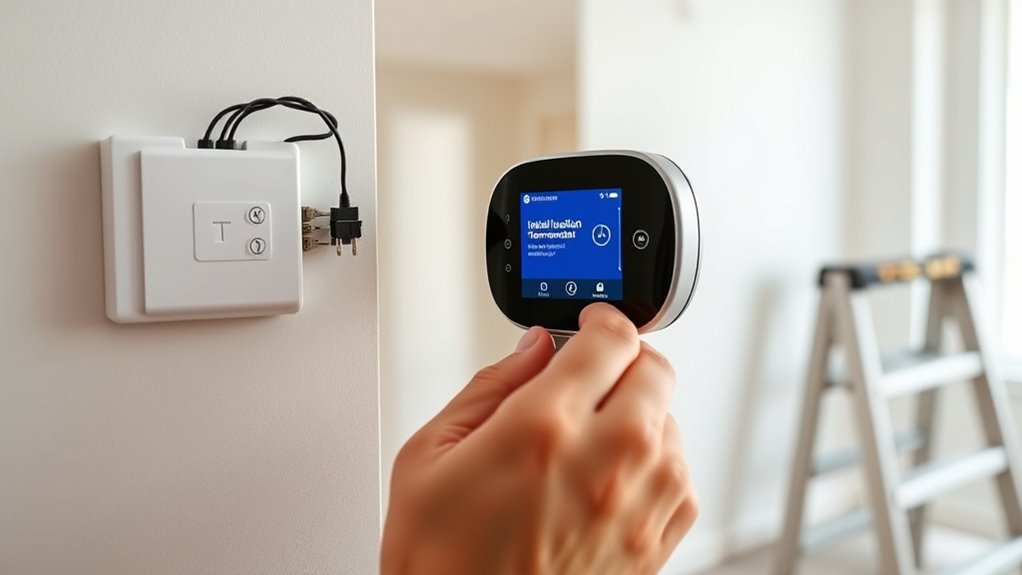
Once you’ve confirmed compatibility and noted your wiring, you can proceed to remove the old thermostat. Carefully disconnect the wires, making sure not to let them touch each other or other metal parts. Mount the new base plate of your smart thermostat to the wall, ensuring it’s level and securely attached. Follow the manufacturer’s instructions for connecting the wires to the new thermostat. Many models have color-coded terminals, making the process easier, but if your wiring differs, consult the device’s wiring diagram or manual. After wiring, attach the thermostat faceplate and turn the power back on.
Finally, complete the setup process through the thermostat’s app or interface. Connect to your Wi-Fi network, input your credentials, and follow the prompts to finish pairing the device. During this process, the thermostat will often run a brief setup routine to guarantee it communicates properly with your home network and HVAC system. Proper wireless compatibility ensures reliable operation and seamless integration with your smart home system. Once installed, you can customize your settings, create schedules, and take advantage of energy-saving features. By paying close attention to wireless compatibility and voltage requirements from the start, you’ll verify a smooth installation and reliable operation of your smart thermostat.

ecobee Power Extender Kit C-Wire Adapter – for ecobee Smart Thermostat Essential – Programmable WiFi Thermostat Accessory
The Power Extender (PEK) is an easy, cost-effective solution for homes without a C or common wire.
As an affiliate, we earn on qualifying purchases.
As an affiliate, we earn on qualifying purchases.
Frequently Asked Questions
Can I Use a Smart Thermostat With a Heat Pump System?
Yes, you can use a smart thermostat with a heat pump system. Just make sure it has heat pump compatibility, meaning it’s designed to work with your system’s specific wiring and controls. Check the smart thermostat features to confirm it supports heat pump operation, including appropriate heating and cooling modes. This way, you get ideal control and energy savings without needing a professional install.
What Tools Are Needed for Installation?
You’ll need a screwdriver to remove your old thermostat and install the new mounting plate. A level helps guarantee proper placement, while a drill may be necessary for wall anchors. Check your smart thermostat’s manual for wireless compatibility features, and verify your power supply is stable and compatible. A smartphone or tablet can also be useful for setup and configuration, making the installation smoother and more efficient.
How Do I Connect the Thermostat to Wi-Fi?
Connecting your smart thermostat to Wi-Fi is easier than you think, and it’s your ticket to a smarter home! First, access the Wi-Fi setup on the thermostat’s menu, then select your network and enter the password. If you face connectivity issues, make sure you’re within range and your router isn’t blocking the signal. Once connected, your thermostat will sync seamlessly, activating all its smart features for ultimate control.
Is Professional Help Necessary for Complicated Wiring?
For complicated wiring, professional help isn’t always necessary, but it’s highly recommended. DIY installation works well for simple wiring, but if your wiring complexity increases, an electrician can guarantee safety and proper setup. You risk damaging your thermostat or HVAC system if you attempt complicated wiring yourself. If you’re unsure about the wiring complexity or feel uncomfortable, calling a pro saves time and guarantees a safe, efficient installation.
How Do I Troubleshoot if the Thermostat Doesn’t Turn On?
Imagine your thermostat’s playing hide-and-seek—no power, no fuss. First, check its wireless compatibility; maybe it’s just out of range. Then, swap out or charge the batteries—poor battery life could be the culprit. If it still doesn’t turn on, verify the circuit breaker and wiring connections. Sometimes, a simple reset or ensuring proper power supply can bring your smart thermostat back to life, hassle-free.
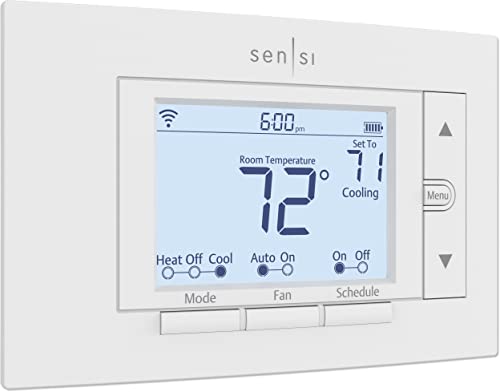
Sensi Smart Thermostat, 100 Years Of Expertise, Wi-Fi, Data Privacy, Programmable, Easy DIY Install, Works With Alexa, Energy Star Certified, Mobile App, ST55
PRIVACY PROTECTION*: Sensi won’t sell your personal information to third parties
As an affiliate, we earn on qualifying purchases.
As an affiliate, we earn on qualifying purchases.
Conclusion
Installing a smart thermostat yourself isn’t just doable—it’s empowering. When you connect the wires correctly and follow the setup steps, you gain control over your home’s comfort and energy use. Think of it like tuning a musical instrument; once it’s in harmony, everything runs smoothly. So, trust your skills, stay patient, and enjoy the satisfaction of a job well done. After all, with a little effort, you’ve proven that DIY can be both simple and rewarding.

HVAC Thermostat Bypass Tool Kit Compatible Replacement for Supco Tradefox Jumper King, Zuomeng Low Voltage Diagnostic Jumper Tool with DIP Switch, Overcurrent Protection, Flame-Retardant Case
Professional HVAC Diagnostic Tool: Quickly bypass thermostats with the jumper tool to test fans, cooling, heating, and heat…
As an affiliate, we earn on qualifying purchases.
As an affiliate, we earn on qualifying purchases.
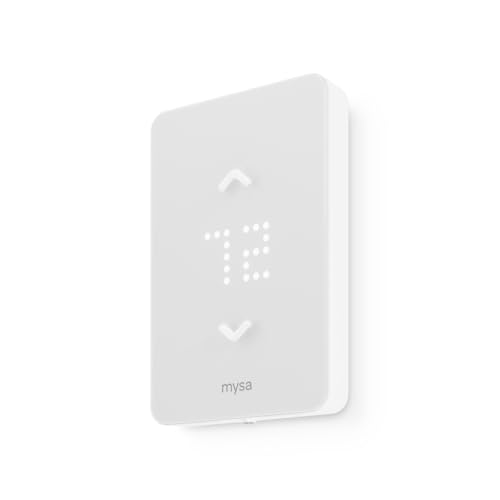
Mysa Smart Thermostat LITE – Line Voltage Electric Baseboard Heater Thermostat 120V/240V | DIY Install | HomeKit, Alexa, Google | Wi-Fi Programmable | App Control
WIFI CONNECTED SMART THERMOSTAT FOR 120V-240V electric baseboard heaters, fan-forced heaters, wall heaters, and convector units.
As an affiliate, we earn on qualifying purchases.
As an affiliate, we earn on qualifying purchases.